Pages

Wednesday, 11 May 2022

eWrap - a versatile simple technique

eWrap is a very simple cast on technique, and more useful that is obvious at first glance.

Here are some examples;

These are examples of eWrap used to cast on every second needle , knit several rows of stocking stitch, then bring the remaining needles into work, pick up the yarn between the previous needles cast on to make a neat, picot edged hem that is not bulky


These are examples of contrast eWrap cast on and contrast yarns eWrapped over the needles on work in progress to create decorative or reinforced bands or edges. Note that the embellishment is on the purl side of the knitting.


Friday, 17 April 2020

Just one machine...


I want any new knitter to consider the proposition that you can knit a wide variety of weights, stitch patterns and knitted items with just one standard gauge punchcard machine. Now if your hobby is machines, rather than knitting, by all means collect every domestic machine and accessory ever produced. Its an interesting study and a potential lifetime hobby, but not much help for a newcomer hoping to make interesting and useful items, with limited hands on support.

“What kind of yarn do you want to knit?” This is the question often put instead of an answer to the question, “I’d like to take up machine knitting, what machine should I get?”

The friendly local knitting machine dealer, only too happy to sell you three gauges of machine, a garter carriage and every conceivable accessory, and to employ an expert to provide ongoing instruction in the use of all these, is an extinct species of business operator.

In my part of the world there are still old, more or less indestructible, standard gauge punchcard machines machines to be found. Even the top of the price range of second hand machines of this sort represents amazing creative value for money, and Op shop bargains still turn up. Even the brand new equivalents, still made by the Silver Reed company, are great creative value.

On a standard gauge machine you can knit a wide range of Weights of Fabric. You do not need to use light, medium or bulky yarns to make light, medium or bulky fabrics. In any case, the range of weights of yarn that can knitted on a standard gauge machine is rather wider than generally recognised.

One machine - one card - one stitch setting
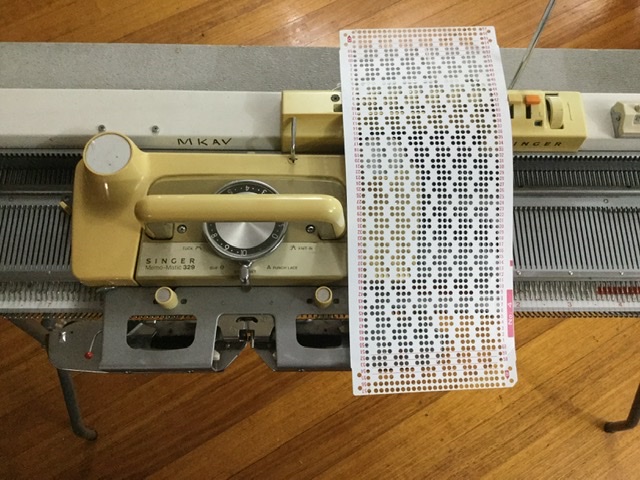
Singer 329 - Card4 - Tuck setting


A textured knit,  pleasing to look at from either side of the fabric


Denise Chevalier’s Let’s Twist Again,
As featured in the the Parade at the 2016 Australian Sheep and Wool Show in Bendigo.
Knitted on a Singer 360 using Card 4 to make textured stripes as described in this earlier blog post


Denise Chevalier again in a previous version of the same design knitted in stocking stitch on the same Singer 360 machine.


Thursday, 7 December 2017

1973 again - Machine Knitted Jacket

This pattern features on several blogs as a warning about the aesthetic danger of enthusiastic, but uncritical embrace of popular craft.

However, it turns out that this has come back into style in some pockets of hipster culture. "That is so cool, can you make me one?"

I did.

 
In the absence of a shotgun, we used a broom for a prop.
I planned to stay with the original styling as closely as possible. The yarn is lighter weight (Superfine Wool Australia 3 ply as opposed to Bluebell 5 ply).
The pockets were left off for technical reasons. The jacket is proportionately longer, a 1973 short jacket needs 1973 high waisted trousers.
The collar is stocking stitch folded over, rather than the heavy original made with two pieces of ribbing.
As I was in the early stages of construction, a young woman who has clearly been the victim of a machine knitter's misguided generosity, kindly sent me a warning that no young person would wear such a garment. She was not aware that I was acting on a request, and it seems that her sartorial comfort zone is a little different.   Also discussed as a Ravelry project 
 

Wednesday, 23 November 2016

Punch lace revisited

A while ago I wrote about various applications for the Punch Lace setting on the Singer/Studio/Knitmaster/Silver Reed machines (Thread Lace on Brother machines). I like the textures I can knit using this setting.
Now my previous post reproduced a chart explaining the relationship between the holes on punchcards and knitting on the various settings on those 24 stitch repeat punchcard machines. Just one problem - no mention of Punch Lace! So here is the key to add in,
Punch Lace:  Punched hole; Needle knits yarn in thread mouth B. Unpunched; Needle knits yarn in thread mouths A & B.
I like the non-lacy applications of the Punch Lace setting, and I like projects where I can set up, then just knit to and fro without worrying about edge stability or anything else that might need intervention.  So to have a selvedge of stitches knitted with both yarns in a punch lace project, I need blank columns on the punchcard. Here's one I punched out last week.


 Card 1, with the centre 2 columns left blank.

It is possible to blank out the unwanted holes with sticky tape if you prefer to adapt a standard Card 1.

Project on the machine, showing textural stripes where the blank columns govern the knit.


Wrapped around Janet, showing the translucent fabric with textured stripes.

After knitting the fabric was washed vigorously, tumbled dried, then steam blocked. This was the finishing process to release the fibres from the spinning oils, and to full the Alpaca slightly. Any later laundering will be a much gentler process.

Detail showing the 2/60 Alpaca/silk (Yarn Mouth B) side of the fabric


Detail showing the 2/28 Alpaca (Yarn Mouth A) side of the fabric

More detail can be found in my Ravelry project notes

Tuesday, 25 October 2016

Read the card, choose your own texture


Some time ago I found an insignificant looking piece of paper and got so excited that I reproduced it and passed it around to any machine knitting friends nearby. No one shared my enthusiasm, but I'll put it here. This chart refers to the Silver Reed  (Studio/Singer/Knitmaster)  24 stitch punchcard machines. I think it is accurate for the Brother punchcard machines as well.


Below are some photos illustrating just one way of using a favourite card, Singer/Studio/Knitmaster Card 4, using tuck stitch and needle selection to make a fabric with sections of different textures, and as a bonus, an automatic wavy edge.


Each needle is controlled by just one column on the card, so with reference to the chart, you can see that there is a 4 stitch pattern repeat, with two needles knitting every row, and two needles alternately knitting and tucking. If you take the needles that knit all the time out of work, you will get an all over  tuck pattern. If you remove from work the needles that tuck, you will get stocking stitch. Study the markings on your needle bed and you will be able to work out which needles are tucking and which are knitting. If you alternate between a few needles tucking and a few needles knitting, you will get nicely contrasting textures in either lacy or solid knit, depending on your yarn and tension.

 Hints
  1.  It helps to start by identifying what the middle 2 needles are doing, then work outwards from there.
  2.  Selecting needles that knit for the edges makes for neat edges.


Friday, 1 April 2016

Swag Blanket Mk2

I've been pleased with my large blankets, useful as outer garments and for many household and travelling purposes. However, although simple, the knitting process was not quite as simple as I would like. Knitting neat edges was not an automatic process. To overcome this I modified Singer/Studio/Knitmaster Card 7 so that I could position two columns of knit stitches on each edge. Of course this meant that two columns in every 24 do not tuck, adding an interesting textural stripe to the fabric. The occasional seersucker type stripe effect is best seen in this project knitted by Marlene.


The seersucker effect comes about because the dominant tuck stitch makes the piece shorter and wider than a plain stocking stitch piece with the same number of stitches and rows. The stitches in the columns where all stitches are knitted are longer than the tuck patterned stitches so they pucker.

This is a modified Singer/Studio/Knitmaster Card 7


The middle two columns are punched out so that the corresponding needles will knit every row. To get a neat selvedge, position the edge where there are columns of knit stitches.


Here is the latest of my enormous, but lightweight blankets, pegged out on the rotary clothes line to show the area and the textured stripes.


This is a simple knitting process. Marlene's project was her first ever on a standard gauge punchcard machine. Some lovely yarn and a simple project made for a happy first experience.
I like the texture so much I will make another modified Card 7 with punched out columns on the edges as well as the center of the card. 

Tuesday, 26 January 2016

Circling the Square


Short rows can make knitting endlessly interesting
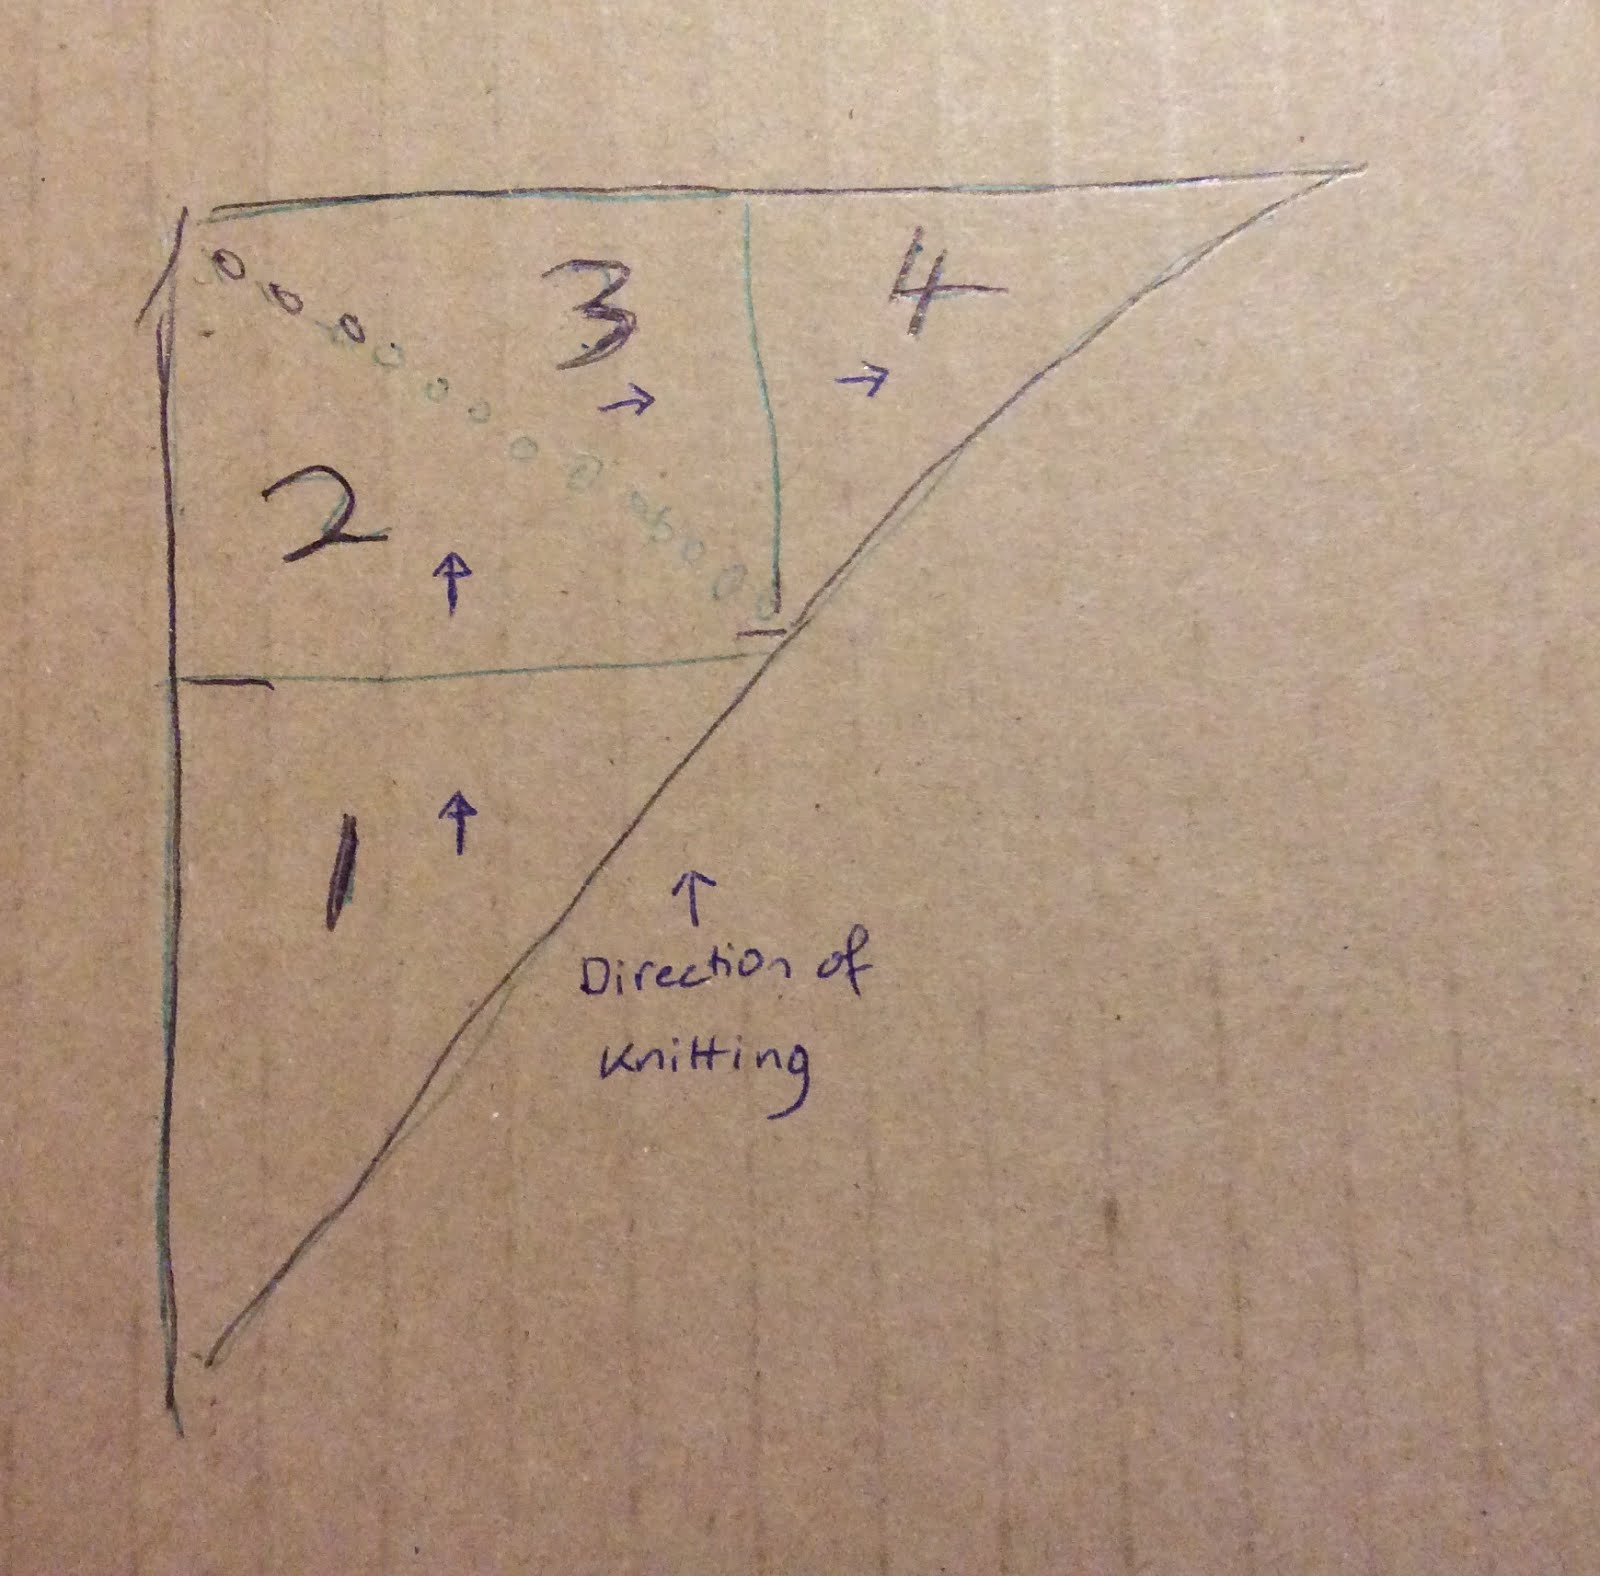
As part of our machine knitting summer school for new knitters we played with short rows to make different shapes. I began thinking about triangles and squares. I think of what we knitted  as being made up of four sections.


Section 1 is start with two stitches and increase one stitch at the right end every two rows
Section 2 is put one stitch at right into hold every two rows until only one stitch is in work.
Section 3 is bring one stitch from hold back into work every two rows,
Section 4 is cast off one stitch at right very two rows.


I can knit a square by knitting section 1 then (2 and 3) three times then section 4. It looks like this


I can also insert plain rows between any of the sections. 


If I start by casting on the full width of stitches and then begin with Section 2 and also insert plain rows each time that I get back to having all the stitches in work it looks like this:


I could cast on with waste yarn and then at the graft the final stitches for an invisible join.  
This could become a skirt,. It could also be the basis of the yoke of a jumper with more rows inserted in two of the sections for the front and back and fewer rows for the sleeve sections.

One of  of the new machine knitters, Maree, made another variation by knitting three segments, with some plain rows in the middle.


When I looked at the shape again I realised that I had previously knitted a cardigan using Sections 2 and 3 twice at the bottom to give a slightly flared hip.  
Details are in my Ravelry projects.
here  and here

These circular knitted pieces can be pulled into a square, or can be used to make other interesting shapes. Since knitting stitches are longer than they are wide there are many different effects depending on how you drape the knitting and how loose the tension is.

Thursday, 31 December 2015

What size a shawl?

On a recent trip to New Zealand, with a travelling wardrobe constrained by the packing limitations of international air travel, my Swag Blanket was used most days. We were not camping, but even so it was usually more comfortable to replace or supplement the supplied bedding with my own, super lightweight, natural fibre blanket.  A couple of times it came out walking in the evening, tossed over my summer clothes, warding off the evening chill.

I was resigned to feeling a little eccentric  until I saw a C19th Paisley Shawl displayed in the excellent Toitu -Otago Settler Museum in Dunedin . The early Scottish settlers had shawls the size of bedspreads. I'm sure such a shawl would do double duty as garment and bedding. I have a couple of phone snaps through glass. I hope they are good enough to give you an idea.


There it is, folded double, with some furniture for scale.

Some detail of the pattern

I like this complex, subtly coloured design. Whether the subdued colour is original or the result of more than a century's worth of fading I am not sure.

I take away from this encouragement to turn my excessive quantity of fine, luxury yarns into very large shawls.

Sunday, 26 April 2015

Swag Blanket - Addedum

My knitting friend Tracy adapted the directions for the Swag Blanket to make a wrap.

You can read all about it on her Ravelry Project page if you are a member of that fine community.

She shared a brilliant little tip for all of us Singer/Studio/Knitmaster knitters. Use an odd number of stitches. That way, when you are using Card 7 Tuck, the end stitch of each row will be the same, selected either to knit or to tuck. Hand select the end needle for the two ends-tucking rows, then have a rest for the next two rows. Neatly halves the amount of hand selection in your project.

I was asked to show my Swag blankets to the Surrey Hills Passap group (Surrey Hills in Melbourne that is), so it seemed only proper to try a Passap version. Now the Passap is a very fine machine, but, if I can be anthropomorphic, rather set in its ways. It is not inclined to co operate with techniques and effects that were not contemplated when the manuals were written. It really doesn't approve of the kind of loose tensioned airy fabrics I rather like to knit. I'm sure it would not do a bit of good to point out that the nimble Japanese machines are only too pleased to collaborate in the production of such textures.

I did manage to knit a sample piece in a stitch that would make a splendidly wide blanket if you have just the right yarn to keep the Passap happy with the stitch pattern.

Swag blanket, the Passap version


The essence of the swag blanket is lightness, airiness and comfortable width achieved using tuck stitch.. The sample demonstrates one way to achieve this. The width on the needlebed was only 15 cm. the swatch has simply relaxed out to 36 cm, no stretching or blocking involved. It was begun and ended on waste yarn and both ends cast off by hand, as I had no cast on technique for the Passap, capable of allowing the fabric to stretch to its widest. Even the experts at Surrey Hills couldn't come up with adequately stretchy castings on and off to accommodate this impressive expansion.

Swatch details,
31 needles brought into work on each of the front and back beds. (62 total)
Bring all 62 pushers out. All pushers on one bed in working position, all on the other bed in resting position.
Begin and end with a couple of N N rows
Select AX and both arrows on each lock
Knit 100 rows at Tension 8


Wednesday, 11 February 2015

Swag Blanket - In Short

Machine; Standard gauge flat bed, Knitmaster (Singer /Studio/Silver Reed) 700
Stitch pattern; Card 7 Tuck
Tension; 10
Stitches; 200 (For better edges, try 199)
Rows; 1030
Finished dimensions, unblocked;  2.3 m x 1.25 m ( 91inches x 49 inches)
Finished weight; 350 g
Yarn; Fine, fluffy mohair

Finished blanket, pegged out on my clothes line

For a longer version, complete with excessive detail and diversions, see
Swag Blanket 1- Cast On
Swag Blanket 2 - The Middle
Swag Blanket 3 - The End


Comments,
This is a very adaptable pattern, suitable for lap rugs, scarves, wraps, shrugs, shawls or whatever your imagination dictates.
It is a very open stitch, so take care if catching is likely to be a problem. If the yarn will co operate, fulling can be an improvement. Fine Alpaca fulled would be excellent.

Tuesday, 10 February 2015

Swag Blanket 3 - The End

After 1030 rows, I judged that the blanket was long enough to tuck under my feet, pull up over my head and still be wide enough to cover me in camping mode.
I cast off using a stitched cast off, because it is the best I know of to give adequate  stretch for such an expansive piece. It is not the fastest, nor the most structurally satisfying, if that makes sense, but I know I can make it stretch far enough to not pull in the end.
The excellent and generous Diana Sullivan has a video demonstration
Steps.
1 Knit a final row in Stocking Stitch, with the carriage finishing on the side most comfortable for you to start stitching from. I am right handed, and for me, that is the left hand side.
2. Break the yarn, leaving as much as is manageable to stitch with, and thread a suitable blunt needle. I favour the double eye tool. Officially it is part of the ribber set up, but is the single most useful piece of machine knitting equipment. I buy them by the handful.
3. Stitch across the end of the knitting very loosely, starting a new thread whenever one runs out. I needed three.


4. Remove the blanket for the machine, and mend any flaws that need mending. My blanket has a few end of row loops of yarn, and one spot where a prong of a weight and the carriage arm collided and broke a thread. There are a few other places where things are not exactly as they were meant to be, dropped stitches picked up the wrong way round without tucks for instance, but they are not going to cause any trouble, so they just stay.

I mention the flaws and mending so that you know not to be despondent if your piece is not perfect. So few machine knitted pieces are. Speaking with someone from one of the many knitwear factories around here, whose work is now outsourced off shore, I heard that of the people previously employed there, the one kept on was the mender. The one indispensable employee is the one who can correct the flaws the machine creates every now and then. 

Friday, 6 February 2015

Swag Blanket 2 - The Middle

Just keep knitting.

But you will find that rolling up the weighted cast on rag attached to the knitting becomes too awkward after a while. At that point you can remove the ravel cord and separate the cast on rag from the end of the blanket, and stitch it onto a suitable place to keep the work weighted. Use that blocking wire for the stitching and move the weight up as necessary.


Now it is my intention to refrain from using any machine accessory, other than those that come standard with the machine. But of course some of you own Brother machines, or others that come with cast on combs, which maybe gives me the OK to use a cast on comb for weight


Off hand, I can't think of anyone who uses a cast on comb to cast on, but they are wonderfully useful for weighting work in progress.  Of course many of we Singer owners have inherited cast on combs from the estates of deceased Empisal machines (That is the machines sold in Australia as Empisal, not to be confused with British Empisal Knitmaster machines, which we know as Singers)
With luck, when you get hold of an old Empisal cast on comb, you may get a couple of extra weights as well, so you can hang two on the comb, and use two to continue to keep the edges in order.